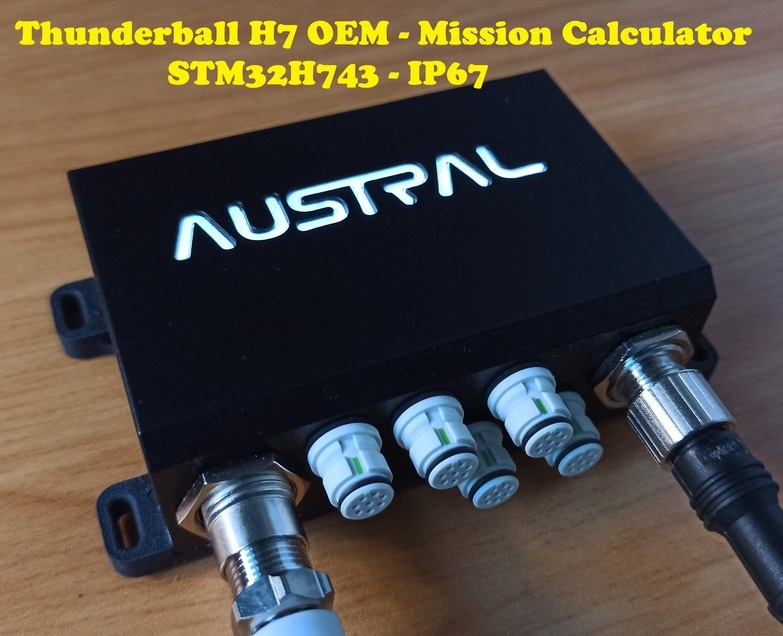
Thunderball H7 OEM – Industrial & Marine Rugged IP67 Calculator / IoT Gateway – STM32H7 Ecosystem
www.austral-elec.com - Intelligent Technologies for Marine, Industrial IoT and Unmanned Vehicles
Applications
The Thunderball H7 OEM is designed for SWaP-sensitive, robust and real-time applications using remote HMI.
It will be embedded into a third-party system in a harsh environment, like wearable edge computing, boats, vehicles, drones, machines, outdoor and underground platforms… and for a wide range of use cases:
- Interfacing : sensors, actuators, PLCs, mission computer…
- Datalog : Data collection, Black box…
- Dashboard : HTML5 dashboard on all browsers and Industrial or marine Multifunction Displays.
- IoT gateway : Marine IoT, IIoT, Cloud IoT…
- Marine : Autopilot, Attitude control, Foiler Flight Control System, Wind calculation…
- Drones / Robotics : ROS2 Client node, Command control, Guidance…
- Overall Equipment Effectiveness (OEE) : Fleet management, Asset tracking, Machine monitoring, Energy Management, Security systems…
- Automation : Building, boat and transportation automation, Climate control…
Sectors : Marine, Industry 4.0, Drones, Robotics, Off-Highway Vehicles, Smart Farming …
Table of contents
- DATASHEETS
- ST AND VSCODE LINKS AND DOCUMENTATIONS
- INSTALL A VSCODE BASED SDK FOR STM32H7
3.1. Note and requirement
3.2. Clone this template with Git
3.3. Install Visual Studio Code
3.4. Install STM32 Tools
3.5. Install the compilation toolchain
3.6. Install the OpenOCD debugger tool
3.7. Setup VsCode for the debugger
3.8. Install debug tools - EVALUATE THE AUTOTEST TEMPLATE
4.1. Note and requirement
4.2. Change the IP Address
4.3. Modify and Compile the Web pages
4.4. Compile the application
4.5. Debug the application using the ST-LINK/V2
4.6. Deploy an image using the USB Bootloader
4.7. How to test Ethernet & Web UI Demos
4.8. How to test a product with this Autotest - MODIFY THE DEVICE CONFIGURATION WITH STM32CUBEMX
- FAQ & TROUBLESHOOTING
6.1. Forum
6.2. Ethernet does not work properly
6.3. RS485 does not work properly
6.4. USB Bootloader does not work properly - TUTORIALS
7.1. Ethernet & Web UI
7.2. FreeRTOS
7.3. CANbus - DISCLAIMERS
1. DATASHEETS
ThunderballH7 Hardware specifications and installation guide
STM32H743VIT6 Datasheet
2. ST AND VSCODE LINKS AND DOCUMENTATIONS
- ST Tools Download
STM32 Embedded Software
STM32 MCUs Software development tools
STM32Cube MCU Package for STM32H7 series
Installing STM32CubeMonitor - ST Tools Tutorials
Introduction to STM32CubeMX
Introduction to STM32Cube Expansion Packages
Introduction and main principles of STM32CubeMonitor - ST STM32H743 Software Examples
NUCLEO-H743ZI
STM32H743I-EVAL - VSCode Tutorials and plugins
Get started with VSCode
Extensions for Visual Studio Code
3. INSTALL A VSCODE BASED SDK FOR STM32H7
3.1. Note and requirement
- Note
ST offers STM32CubeIDE as code editor, it is the easy way to code rapidly.
VSCode is the preferred tool for companies and professionals working on different platforms, OS and languages, especially for the large number of plug-ins and the dark mode. Tool installation on a VSCode SDK is considerably more laborious.
🔴 Installation of the SDK for VSCode has recently been simplified by the publication of a plugin for STM32. 🔴
🔴 The documentation below does not take the new VSCode for STM32 plugin into account at present. 🔴 - Requirement
This SDK is written for a Windows 10/11, 64 bits computer, but it can be adapted for development under Linux or Mac.
Installing STM32CubeMX on Linux or Mac
3.2. Clone this template with Git
-
Install Git for windows
Installing Git for Windows tutorial -
Clone the repository
To make a “C:\git” directory and clone the template from github, type in a Windows console :cd c:\ mkdir git cd git git clone https://github.com/austral-electronics/ThunderballH7.git cd ThunderballH7 dirOption : You can also install TortoiseGit (overlay icons showing the file status)
3.3. Install Visual Studio Code
- Install Visual Studio code for windows
- Install somes plugins :
3.4. Install ST STM32 Tools
- Install STM32CubeMX-Win 🔴 Select CubeMX Version 6.4.0 🔴
- Install the STM32Cube MCU Package for STM32H7 series 🔴 If required : Select Version 1.9.1 🔴
- Install STM32CubePrg-W64
Install STM32 ST-LINK Utility
3.5. Install the compilation toolchain
- Download the Arm GNU Toolchain
select a Windows hosted cross toolchains for AArch32 bare-metal target (arm-none-eabi) in zip format
Note : This SDK is tested with gcc-arm-none-eabi-10.3-2021.10-win32.zip - Unzip the Arm GNU Toolchain in the folder like “C:/git/toolchain”. (Take care to replace space with ‘-‘ character in path directories)
- Test the “gcc” link in a Windows console or in a VSCode Terminal
C:\git\ThunderballH7> ..\\toolchain\\gcc-arm-none-eabi-10.3-2021.10\\bin\\\arm-none-eabi-gcc -v ... gcc version 10.3.1 20210824 (release) (GNU Arm Embedded Toolchain 10.3-2021.10) - Download “make” for windows (binary & depedencies) from The xPack Project
Note :
- This SDK is tested with xpack-windows-build-tools-4.2.1-2
- You can also try the “make” from : http://gnuwin32.sourceforge.net/packages/make.htm - Install the “xpack-windows-build-tools-XXX” directory in a folder like “C:/git/toolchain”
- Add the path of “make” (C:\git\toolchain\xpack-windows-build-tools-XXX\bin) to environment variables of Windows
- Test the “make” link in a Windows console or in a VSCode Terminal
C:\git>make -v
GNU Make 4.2.1
Built for x86_64-w64-mingw32
3.6. Install the debugger tool
- Download pre-built OpenOCD for Windows
Note : This SDK is tested with the 20211118 version - Unzip OpenOCD in a folder like “C:/git/toolchain”. (Take care to replace space with ‘-‘ char in path directories)
3.7. Setup VSCode for the OpenOCD debugger and test the cross-compilation
- If needed modify the “compilerPath” in the file “.vccode/c_cpp_properties.json”
- If needed modify the “serverpath” and “gdbPath” in the file “.vccode/launch.json”
- If needed modify the “OPENOCD_PATH” and “GCC_PATH” in the “makefile”
- Test “make” and “make FLASH=Y” in a VSCode terminal to compile the project and deploy the project in the target
3.8. Install debug tools
4. EVALUATE THE AUTOTEST TEMPLATE
4.1. Note and requirement
-
Note
This template is intentionally as simple as possible, it is a bare metal example, without DMA or interrupt, using the STM32CubeMX Code Generator for peripherals configuration.
This template performs the functional test by operating all hardware peripherals as well as the basic software peripherals.
You can easily clone this example as the basis for your project, so you won’t need the SDK directory. -
Requirement
- To Bootload a new image using the USB Bootloader:
- Thunderball H7 OEM - STM32 H7 Calculator
- USB-A to USB-C cable (Android phone charging cable)
- A PC with STM32CubeProgrammer
- To test the Web pages demo:
- M12<->RJ45 Ethernet Cable
- M12 CANBus Cable (NMEA2000 Cable)
- 12V Power Supply
- To compile and test an RS232 Console on COM1 (stdio redirection) as well as the FRAM, RTC and backlight:
- A Binder 620 to DB9 RS232 cable + an USB To Serial DB9 (RS232) Adapter Cable (see Datasheet for wiring)
- A PC with this SDK
- To debug in JTAG/SWD:
- Thunderball H7 version with a blind Grommet in the base of the enclosure to access to JTAG/SWD JST connector (See the datasheet)
- ST-LINK/V2 Probe
- JST_2_Ribbon_JTAG_Cable - JTAG Adapter (See the datasheet)
- To perform the entire functional test:
- A small CANbus installation with a sensor that periodically transmits frames.
- A CANbus Analyser (See frames sended)
- A RS422 point-to-point cable (!!! with terminations and bias resistors !!!) to send data from TX+/TX- on one COM to RX+/RX- on another.
- A Binder 620 to RS232 RX only DB9 cable (see Datasheet for wiring)
- Another USB To Serial DB9 (RS232) Adapter Cable
- Strap the RTS to CTS to fully test the COM1 port
- To Bootload a new image using the USB Bootloader:
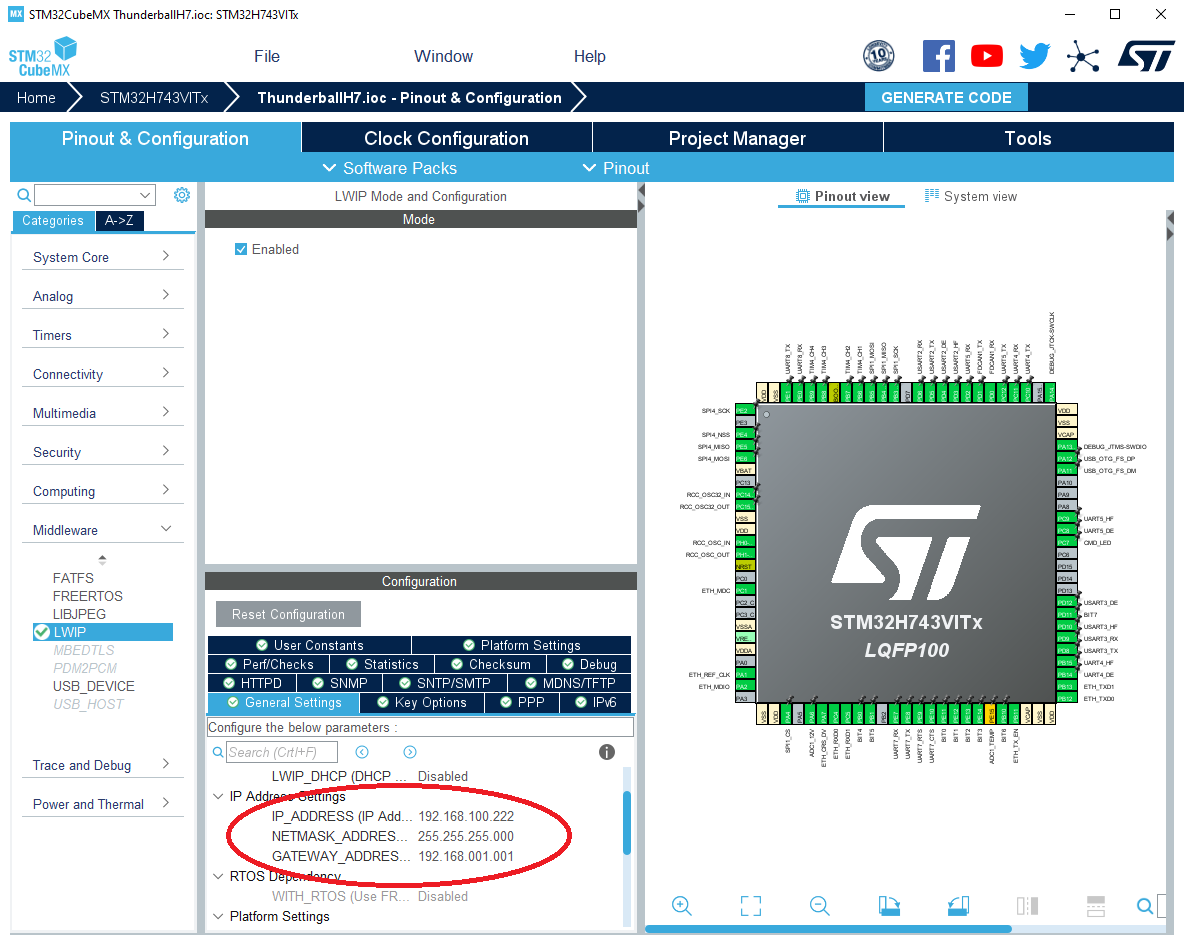
4.2. Change the IP Address
The default IP Adress is static at 192.168.100.222.
To change this address rapidly edit the file “LWIP/App/lwip.c” line 63 and recompile.
Note : This setting will be erased by CubeMX’s automatic code generation, and you will have to change the settings in CubeMX->LWIP->General Settings (See Chapter 5).
4.3. Modify and Compile the Web pages
If you modify the web pages, you must first compile the web pages with makefsdata.exe before compiling the application.
Put the file makefsdata.exe in the folder middleware/third_party/lwip/scr/apps/httpd and run the executable.
It will create the file fsdata.c, which must be excluded from the buid right-click on it in the project and resource configuration/exclude.
Run in the VS Code terminal :
cd .\Middlewares\Third_Party\LwIP\src\apps\http\
.\makefsdata.exe
cd ../../../../../..
4.4. Compile the application
In a VSCode Terminal :
- Clean and recompile the entire project
make clean make -j8 all - Compile modified parts of the project
make - Compile and flash the STM32 using the JTAG/SWD tool
make FLASH=Y4.5. Debug the application using the ST-LINK/V2
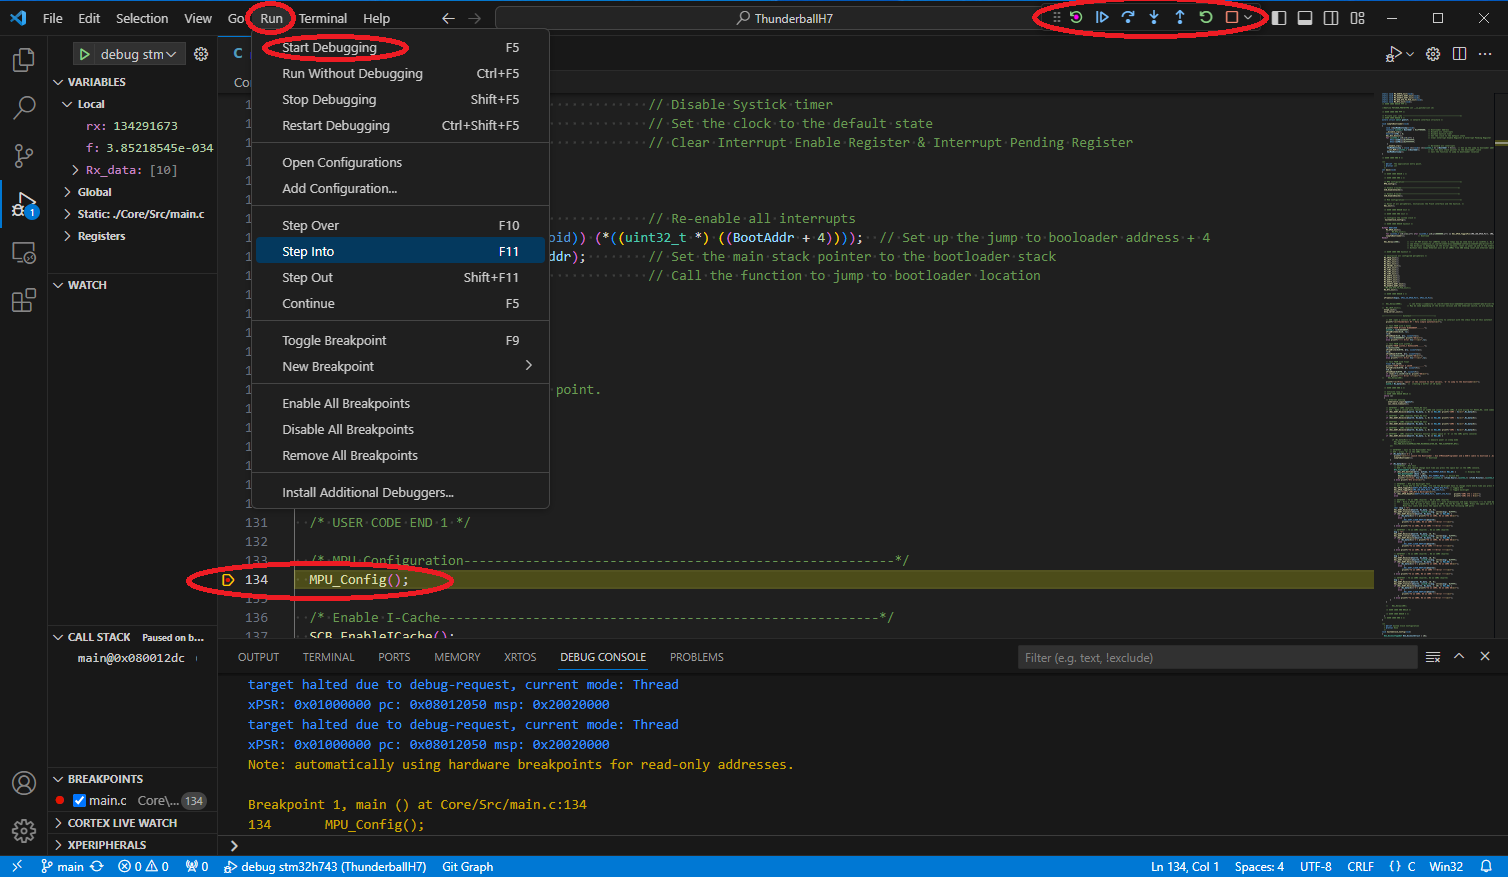
- Cut off power supply
- Connect the ST-LINK/V2 probe to the JST JTAG/SWD connector (See the datasheet).
- Power the ThunderballH7
- In VSCode, Flash and Run the application pressing “F5” or “Run” -> “Start Debugging”
- See the “DEBUG CONSOLE” in order to monitor the proper functioning
- Stop the application with “Shift+F5”
How to place breakpoints and watch variables, stack and memory
VSCode Cortex-Debug Launch Configurations
4.6. Deploy an image using the USB Bootloader
This procedure enables on-site software updates for prototypes and small series to be carried out by the customer or a technician, using a simple PC and USB cable.
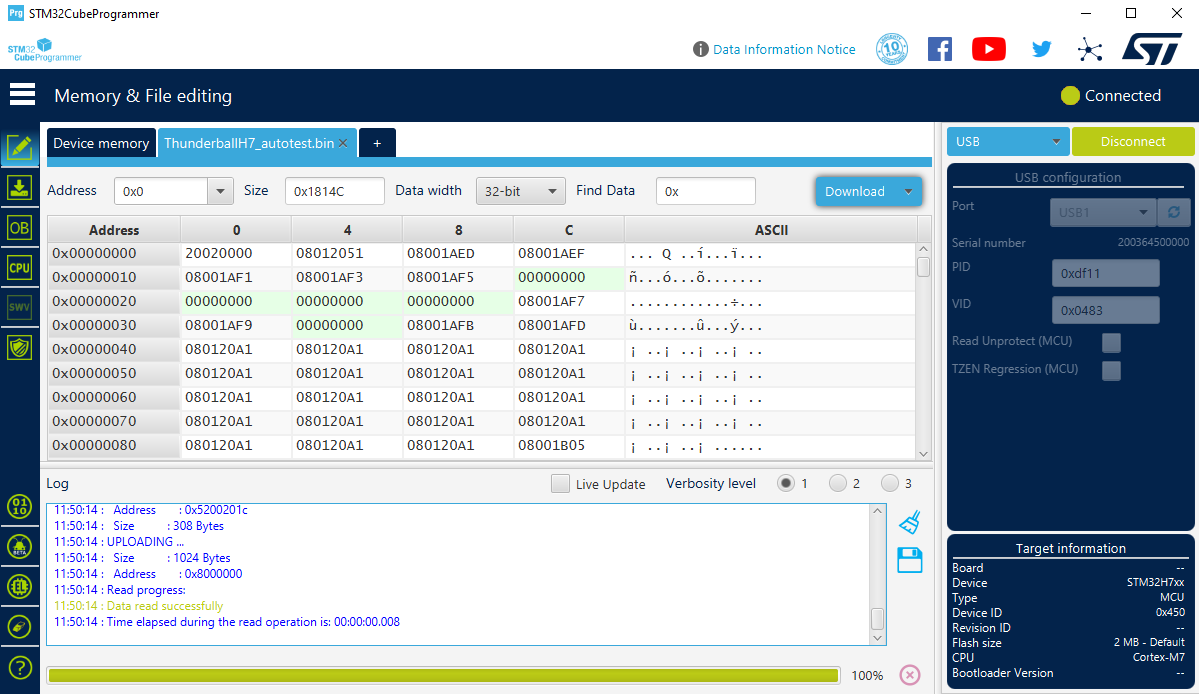
- Get a .bin image :
- Compile the web pages and the application.
- The image generated is in “C:\git\ThunderballH7\build\ThunderballH7.bin”
- There is also a precompiled test image in “C:\git\ThunderballH7\SDK\Bin\ThunderballH7_autotest.bin”
- Cut off power supply
- Launch the STM32CubeProgrammer Software
- Connect a USB-A to USB-C cable between PC and ThunderballH7
- The backlight lights up for 2 seconds and you should hear the USB driver notification sound
- In STM32CubeProgrammer :
- If required, select “USB”
- In USB configuration -> Port you must have USB1 displayed, you can refresh to see it
- Click on “Connect”
- Open the .bin file with “Memory & File editing” -> “Open file”
- Flash with “Download”
- Unplug the USB cable, an power up the supply.
4.7. How to test Ethernet & Web UI Demos
Connect the ThunderballH7 to an ethernet switch an power on
Open a windows/VSCode terminal and test the ping : PING 192.168.100.222
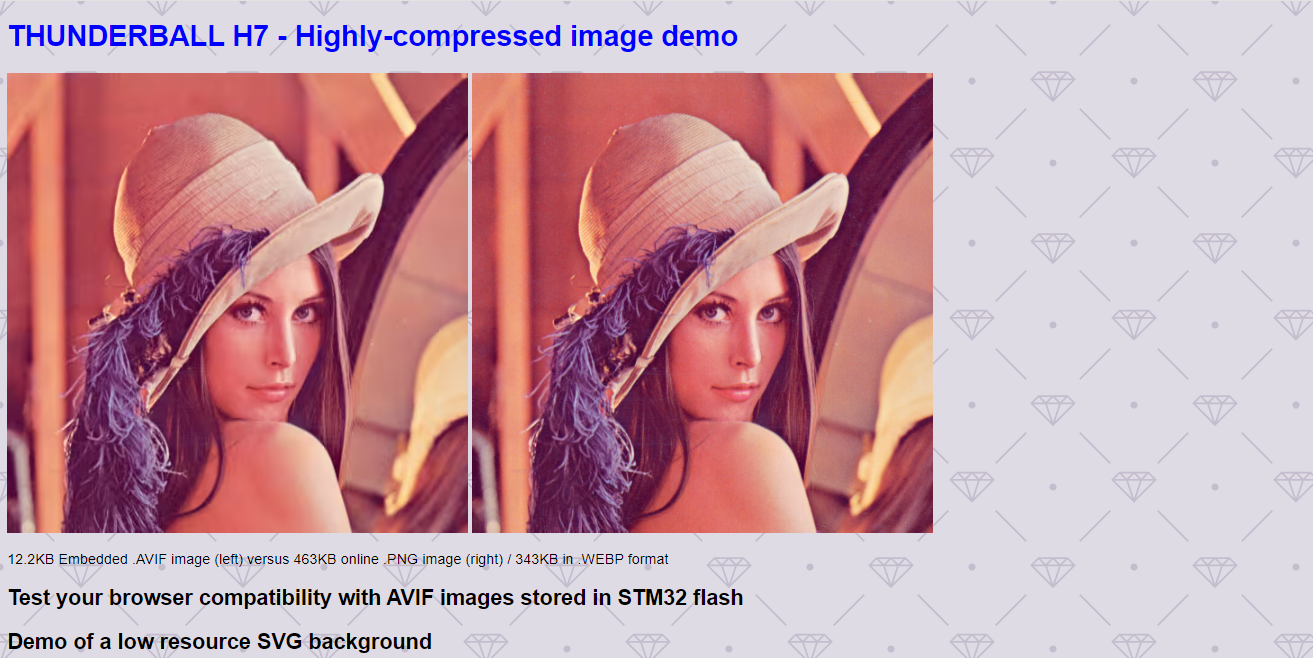
Then open a very simple web pages at 192.168.100.222 with any browser, you will see a web page with:
- A static page and a “Burger” Menu demo
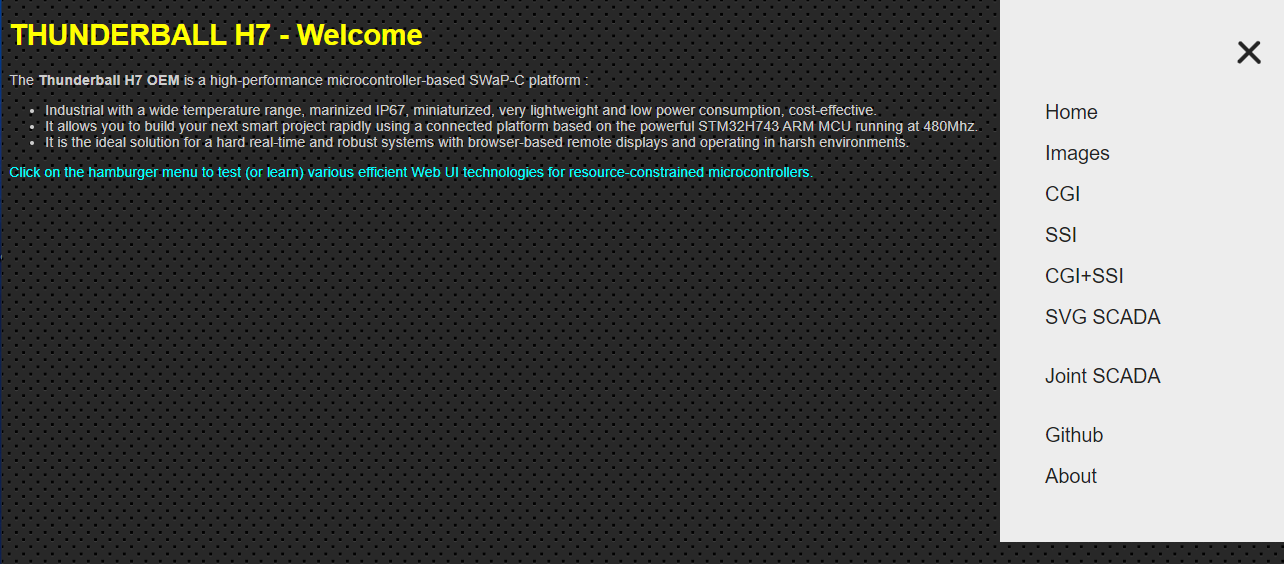
- A .AVIF Image demo
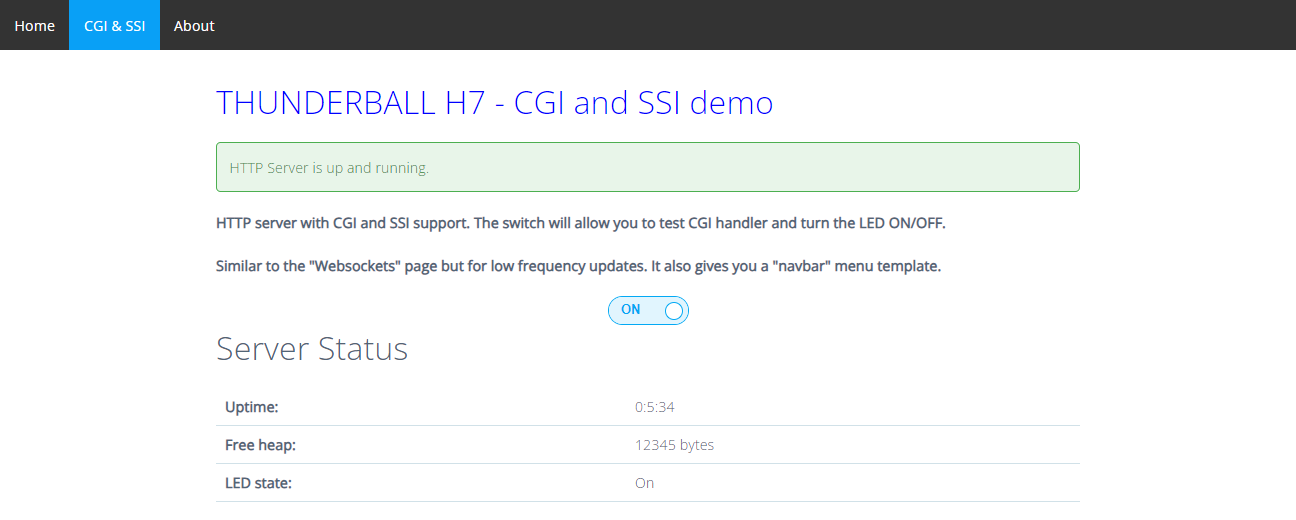
- A very simple CGI demo

- A very simple SSI dynamic page demo

- A CGI + SSI Page with a “navbar” Menu demo
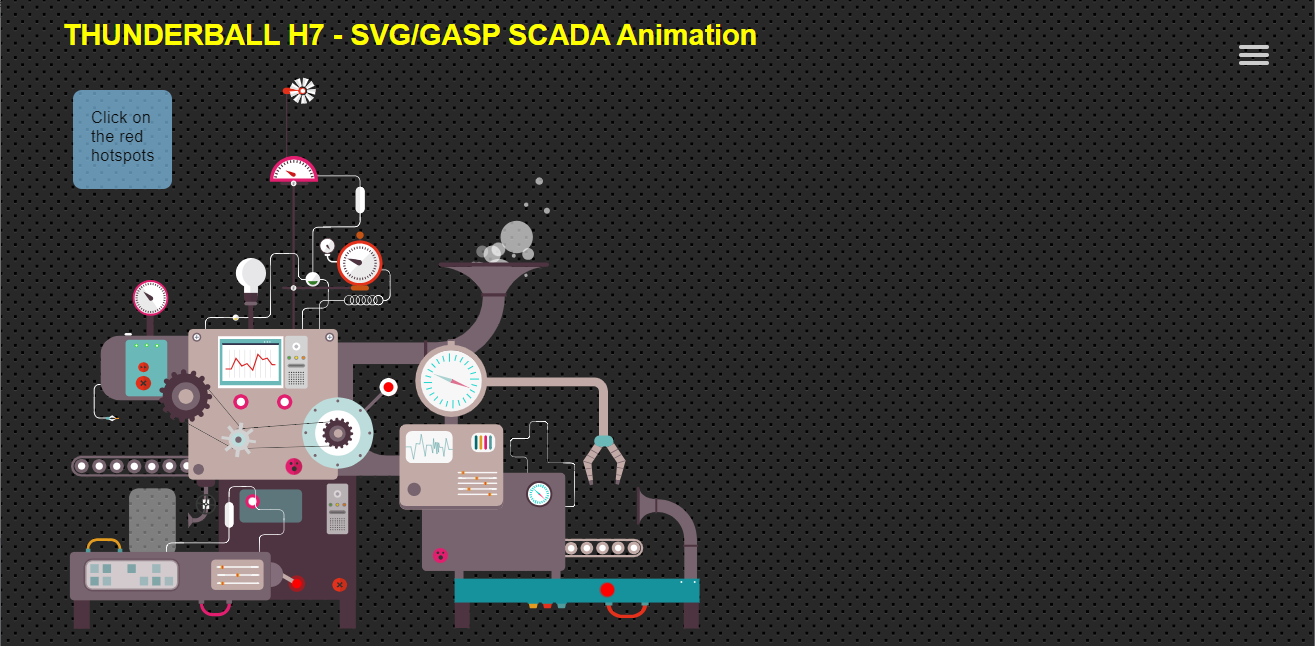
- A animated SVG+GASP SCADA Demo
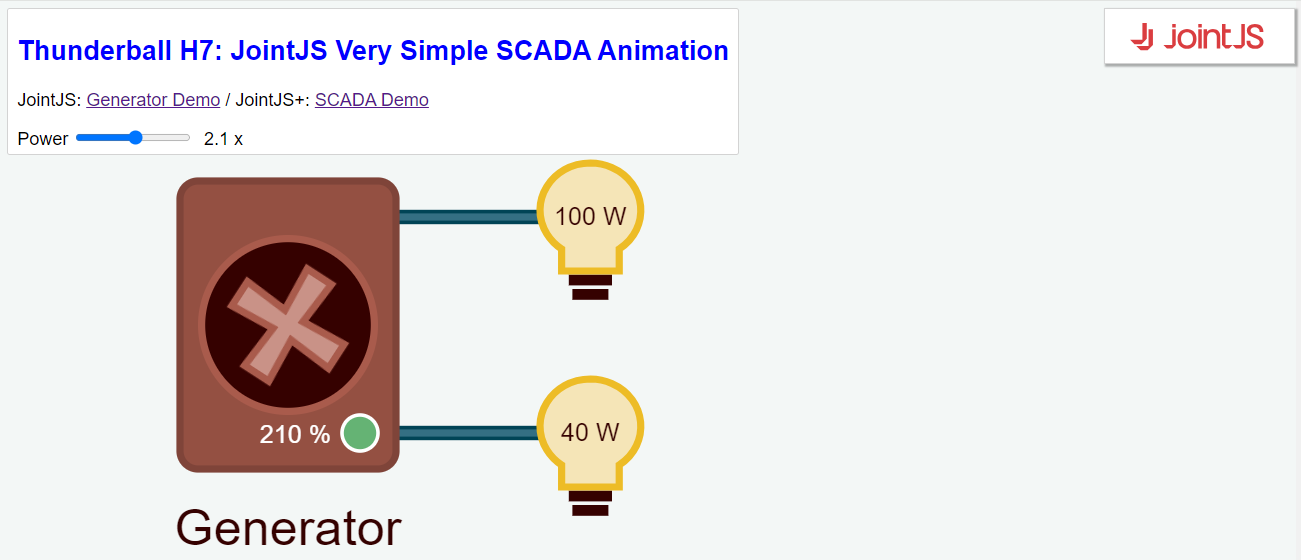
- A simple JointJS SCADA Demo (Try also the Joint JS Plus link)
4.8. How to test a product with this Autotest
- Test COM1 RX & FRAM
- Connect COM1 of the thunderballH7 to a PC using a USB <->RS232 adapter
- Open the device manager to see the COMx port name
- Open a Console with PuTTY (Serial, COMx, 115200 bauds)
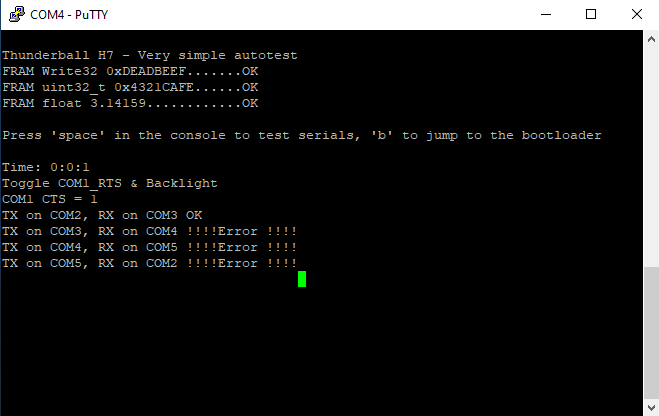
- Power up the ThunderballH7, you must see in the serial console :
- Test RTC, Backlight, COM1 TX/CTS/RTS
- Strap RTS to CTS on COM1
- Press “space” in the serial console
- You must see :
- the time evolve
- a toggle on the logo backlight (Warning : There is another backlight toggle on CANbus Sentence Reception)
- a toggle on the COM1 CTS
- Test COM2 to COM5 in RS422/RS485 mode
- A RS422 point-to-point cable (!!! with terminations and bias resistors !!!) is required to send data from TX+/TX- on one COM to RX+/RX- on another.
- Connect TX side to COM2 and RX side to COM3 and press “space”
- You must see “TX on COM2, RX on COM3 OK”
- Strap the next COM ports and restart the test with “space” for the others 3 combinaisons.
- Test COM2 to COM5 in RS232 RX only mode
- With a Binder 620 to RS232 RX only DB9 cable (see Datasheet for wiring) and another USB <->RS232 adapter
- Open another PuTTY serial console (Serial, COMy, 115200 bauds)
- Connect this RS232_RX cable to COM2
- Send any character with this COM2 console, you must see “COM2:x” in the COM1 console
- Test COM3 to COM5
- Test the CANbus
- Connect The Thunderball H7 and a CANBus/NMEA2000 Analyser to a small bus with a 12V power and terminators
- Configure the Analyser at 250KBs, Extended_ID, Classic Mode
- Press “space” in the COM1 serial console to send a sentence with PGN 127250 (Vessel Heading) and Heading=343 Degree Mag
- Send a Sentence with the Analyser (or any NMEA2000 Instrument), you must see a toggle of the Logo backlight on each good reception
Note : Set a Breakpoint in “App/Main/canbus.c” file and “HAL_FDCAN_RxFifo0Callback” function to verify the datas
- Test the bootloader software jump
- This method may be necessary on products using the USB device port, that do not set BOOT0 by powering with a USB-C cable.
- Press ‘b’ in the COM1 console
- Test the bootload with STM32CubeProgrammer
5. MODIFY THE DEVICE CONFIGURATION WITH STM32CUBEMX
🔴 This template was created in early 2022 using “STM32CubeMX” 6.4.0 and “STM32Cube MCU Package for STM32H7” 1.9.1 🔴
These versions contain known bugs (Ethernet driver, HTTPD_USE_CUSTOM_FSDATA…) and have been upgraded since.
Some modifications applied after the cubeMX code generation are probably no longer applicable with a newer package version.
Warning : New problems appear with more recent versions of CubeMx using old package or in recent CubeMx and H7 Package.
And ST doesn’t provide example for Nucleo using cubeMX and LwIP and doesn’t update Nucleo-H743 demos when drivers change.
Changing package versions can be a laborious task.
With Windows Explorer, click “C:\git\ThunderballH7\ThunderballH7.ioc” to open CubeMX with the template configuration.
You’ll certainly need to change IP, DMAs, Baudrates, Interrupts, FATFS, FREERTOS… in your application if you use this simple template as a basis.
The default STM32H743VIT6 Pinout is described in the datasheet and the CPU clock is adjust to the max (480Mhz).
- Change IP Address Settings Change the settings in CubeMX->LWIP->General Settings
- Modifications applied to generated source code after CubeMX automatic code generation:
- Use origin web page by diseabling custom web page (@ line 93) in file “LWIP\Target\lwipopts.h”: HTTPD_USE_CUSTOM_FSDATA 0
- Generate “fsdata.c” by executing “./makefsdata.exe” in the folder: “Middlewares\Third_Party\LwIP\src\apps\http”
- Compile the project with : make -j8 all
- Todo creating a new project:
- Create the CubeMx project and follow instruction from st: https://community.st.com/s/article/How-to-create-project-for-STM32H7-with-Ethernet-and-LwIP-stack-working
- If it is a VScode project with a makefile, add “DATA_IN_D2_SRAM” in C defines (C_DEFS) of the makefile
- Exclude fsdata.c from compilation. right clic on file “fsdata.c” and then “Ressource configuration/exclude”.
If “fsdata.c” is hidden, right clic on project and the refresh.
6. FAQ & TROUBLESHOOTING
6.1. Forum
6.2. Ethernet does not work properly
🔴 There are 2 Ethernet driver bugs (H743 too fast & auto-negociation) in the “STM32Cube MCU Package for STM32H7” version 1.9.1 : 🔴
- PHY driver for LAN8742 issue
- Ethernet low_level_init does not handle return code from LAN8742_init
- LAN8742 startup issue
Waiting for an official Fix from ST :
- We had to introduce a delay of 500 to 1500ms at the boot (main.c, line 149)
- Without this tempo, Ethernet will be at 10Mbs from SWD debug reset and ethernet operation will not be ensured from a power up
- The duration is depending of the soft reset vs power up and of the ethernet switch auto-negotiation time (switch model, 100MB or 1GB)
- Note : A delay may be already in lan8742.c on a newer package
To configure cubeMX, read the ST tutorials :
- https://community.st.com/t5/stm32-mcus/how-to-create-project-for-stm32h7-with-ethernet-and-lwip-stack/ta-p/49308
- https://community.st.com/t5/stm32-mcus/ethernet-not-working-on-stm32h7x3/ta-p/49479
- https://github.com/stm32-hotspot/STM32H7-LwIP-Examples
6.3. RS485 does not work properly
See Termination and biasing resistors problem on the datasheet
6.4. USB Bootloader does not work properly
There is a new problem which appeared with STM32CubeProgrammer, this error has been reported on the forums in October 2023.
The USB bootload stops during flashing when the bootload launch was done with a software jump.
We have found that performing a “Verify” before “Download” significantly improves the probability of success.
🟢 It works properly with an hardware launch when powering using USB-C (when BOOT0 is maintained at 1 the entire flashing procedure) 🟢
7. TUTORIALS
7.1. Ethernet & Web UI
- Low size Web UI for MCU:
-
LwIP : Web Server, TCP, UDP, Ajax, CGI, SSI, Websocket:
controllerstech.com - Mongoose Web Server :
Device Web UI dashboard: STM32 :: CubeIDE :: Bare metal :: HTTP, Websocket, MQTT
Mongoose Web Server documentation
Mongoose Web Server templates for Nucleo-H743ZI2
7.2. FreeRTOS
7.3. CANbus
8. DISCLAIMERS
Copyright (C) 2022 Austral Electronics SARL. Changes to the specifications and features in this manual may be made by Austral without prior notice. Specifications and information provided in this manual are for informational use only. Austral assumes no responsibility or liability for any errors or inaccuracies that may appear in this manual including the product & / or software. All trademarks mentioned in this manual are property of their respective owners. This product contains copyrighted software which are released under multiple open source licenses including but not limited to the GNU GPL, LGPL, and MIT BSD licenses. Such software is provided without warranty. Copies of these licenses are included in the software itself in further detail. For the latest up to date information, please visit our Github Repository at https://github.com/austral-electronics/ThunderballH7